Music Video

Our Music Video:

Group 3 Music Video

Group 3 Front and Back Cover Digipak

The Digipak Front and Back Cover:

Our digipak front and back cover

Our digipak front and back cover

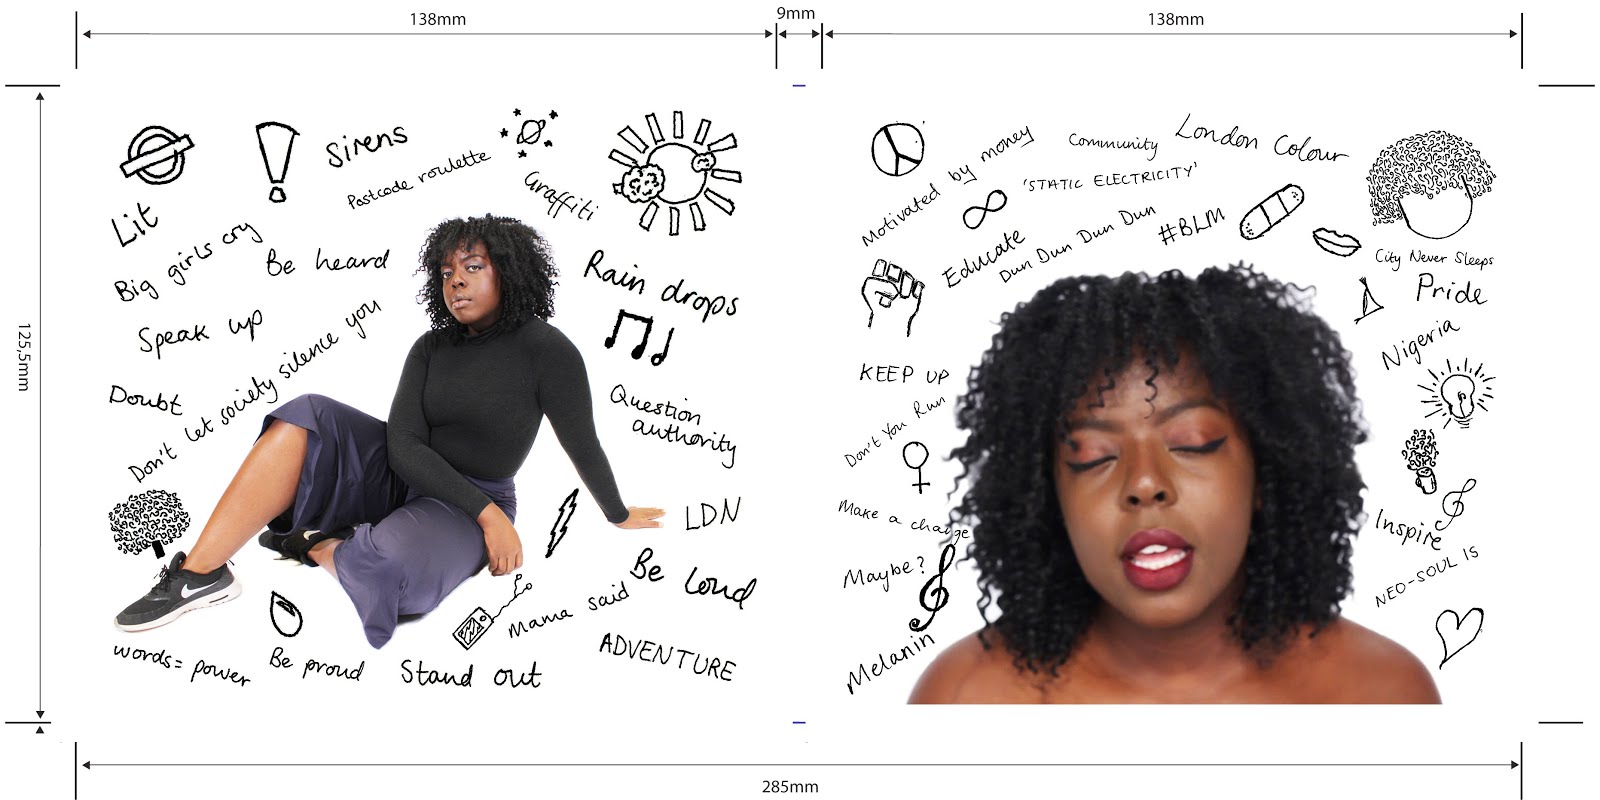
Group 3 Inside Cover Digipak

The Digipak Inside Cover:

Our digipak inside cover

Our digipak inside cover
Our artist's website:

Click the image below to access the website for Layla Obi


Wednesday 3 February 2016

R+P Post 15: Our planned filming loacation and set design

We planned on filming at six locations:

  1. Alex's house
  2. Arnos Grove Train Station
  3. Southgate Train Station
  4. Oakwood Train Station
  5. Arnos Park
  6. The Seward Studio (located in The Latymer School)

Shooting in Alex's bedroom
Alex's bedroom was the perfect location for the hacking scenes, for there was a laptop there we could use for the hacking shots and it was located close to Arnos Park and Arnos Grove train station, where we were to film some of our shots. We didn't want our main character to seem like just an ordinary teenager, so the bland set design of just a table, laptop, wardrobe and white walls made the character seem more grown up instead of having posters, toys and clothes around that would make him seem like a stereotypical teenage character instead of the hacker he really was.

We filmed at train stations, because they could show that our film was set in London and that the hacker was travelling. It also helped building the mystery to the character working for the conspiracy organisation, who were tracking his GPS and following him to underneath the bridge, where he gets held at gun point and knocked down, for the tube is a place that is mysterious, for there will always be a lot of strangers there and it's a place where people don't talk much, so it adds to the drama and intensity of the action-thriller genre when he does find he's being followed by a stranger. We couldn't alter the set design for the tube

Arnos park was a useful location to shoot at due to the impressive, large train arches that we could use to film under for the chase scene, which would also offer us and our equipment shelter from the rain when filming. Also the park was near Alex's house and the Arnos Grove station. The aesthetic of the arches seemed to match the gritty edginess that we were looking for when choosing the location. The greatness of the height of the arches made it seem an intimidating place to be chased under. We couldn't alter the park itself for set design, but decided that doing the film under the arches let us experiment with such a unique location for filming.

The Seward Studio is located in the Latymer School and has many computers back there allowing us to upload the clips of the CCTV footage and to also have the screen of the hacker cropped onto the government, conspiracy organisation's computer screen in order for them to show that they know that they're being hacked. The location seemed very high-tech and we could alter the lighting both artificially and naturally to best suit the type of lighting we were looking for. When made sure the lighting for set set design was dark and mysterious yet visible for them to see the characters and what was going on. We closed all the blinds and used some artificial lighting near the computer desk.

R+P Post 14: Our Call Sheet/Shot List


We decided the shoot board was unnecessary for our main shoot, for we were already familiar with each shot we were going to shoot.

We created a call sheet that listed everyone involved in the production of the film with their contact number and what time they were to be called for acting, helping us organise meeting times and avoid misunderstandings with any timings for acting on set.

Our Call Sheet
We also created a shot list, which was a list of the shots in order that we would film with a brief description for each one and a rough timing, which was all we needed at that stage, because of the great familiarity we had with the shots we were going to shoot. It also included a props list listing props, such as guns or a laptop.


Our Shot List


R+P Post 13: Our Shoot-Board

Our Shoot-Board
After the column showing the shot number, there was a column for the timings to film each shot. We had to estimate how long it would take for each shot to be done, but some shots did take longer than expected to be finished, especially the shots we shot at the tube station locations. On reflection, in future projects I will compensate more for that realistic actuality of going over the time limit for a few shots by making the time longer for each shot to be filmed.

We took shots from our storyboard to show the framing of each one and had information on the actors and props being used for each shot, so that we could plan our time better and arrange the precise acting times to meet the different actors for the shots they would be in. The confirmation of the the job of the Director and Camera-man for each shot made sure to not waist any time on coming up to that decision on set.

The two last columns were for writing down how many takes we had done and which one we preferred out of all of them, which saved us a lot of time of having to find the right takes and watching through in the editing process, as we knew which ones we desired out of the ones, because we had previously identified it.

The shoot board definitely boosted our efficiency through it helping the organisation process when filming, but by the time we had reached the main shoot we were already familiar with each shot we were going to shoot, so we made a shot list instead. This meant that we could just tick off when we had done each shot and it was a lot quicker to use on set.


R+P Post 12: Our Animatic


After finishing the storyboard, we created an animatic at school with our chosen music and sound effects that would be used on the opening sequence. This helped us to critique our film's overall package, looking at the way our sequence would tell the story and convey the genre well and keep a good level of continuity with a variety of shot types.


When working on the animatic, we saw that including a typewriter type of font would make for the best font used for the titles in the film, for it helped connote the cyber-security genre well. We also had to decide on slightly altering the shots on the storyboard in order to keep a greater continuity within the narrative, as we helped put the shots of the hacker on the tube at the specific place in the sequence in which we chose to put it. We learnt that we had to make a faster pace during the action at the end of the sequence when we put all our photos together, seeing that the shots of the chase were too long and weren't suspenseful enough to create the level of action we intended to have. We also decided that our electronic glitch song to be used in the animatic, which was also of the correct length of time that we had to aim to achieve reaching in the sequence itself.

R+P Post 11: Our Storyboard

The storyboard we created had over thirty post-it notes to represent a variety of shots, which were posted on an A2 sheet, showing the order of the shots to help keep the sequence continuous and give us a practical design and backboard to our story with a greater understanding of our multiple shots that we were going to use. Our titles were red, close ups were yellow, mid shots were green and long shots were blue. It was very useful to visualise the variety of shot types we would use and be able to see the framing and blocking needed in each shot, so that when it came to directing, we could easily sort it out.

Our Storyboard
We could quickly trial our different shots in the test shot by using our storyboard and then physically see what types of shots worked best and which ones didn't. There were many close-ups and medium shots in our storyboard as it helped to create tension suitable for the action-thriller genre, as it would make the audience feel more involved in the action throughout.